Sweet golden-yellow, that is the pumpkin;
Dark grey-blue, that is the cloud…
HAPPY HALLOWEEN!!
At the end of October, Edlyn, Sophia and I worked as a group and started to plan a project from the beginning. Before the pitch, we tested the Velostat as the demo and all thought it was so useful to build contact interaction between the audience and the “toy”. We were then inspired by the Halloween atmosphere and quickly decided to make an interacting Halloween pumpkin and two lovely stormy clouds! The SIE company established and our first collaborative project began.
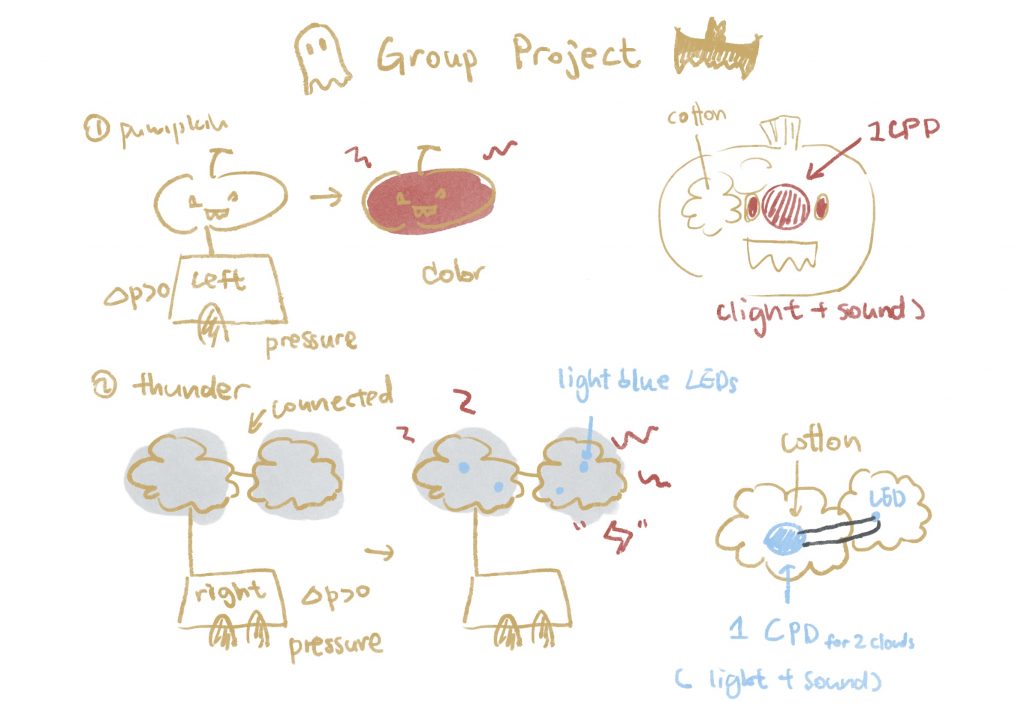
Based on our plan, together using the cool Velostat technique, we decided to use 1 CPD for the pumpkin, 1 CPD and another connecting LED for the two clouds and two pieces of Velostat separately. CPDs were responsible for both changing light effects and sound. Originally we wanted it to have the creepy sound or the scary sound of storms, but it was a little hard for a little CPD. Hence we replaced it with 2 Halloween related songs instead!
One is from Cardcaptor Sakura, which was introduced before:
Another one is a famous Vocaloid song which fits the Halloween scene:
After making sure of the fundamental setting of our products, each of us took charge of one part. For me, I was responsible for coding and connecting the circuit. Sophia and Edlyn took the parts of making the fluffy pumpkin and clouds as well as combining all the stuff.
Honestly, it was REALLY hard as it was my first time trying to bring external connections to the CPD for making the cloud, and Velostat was also a new skill for me. But to embrace the fresh knowledge, I carefully followed the Velostat tutorial on the class website (Thank you, Audrey!) and drew two paper models with the shape of the pumpkin and the cloud for testing. At first, I didn’t realize it was important to leave space for the copper tapes on two sides so that they touch each other and cause a short circuit, but then I quickly edited it. As shown below, the shaded area is the part that must be covered with the copper tape.
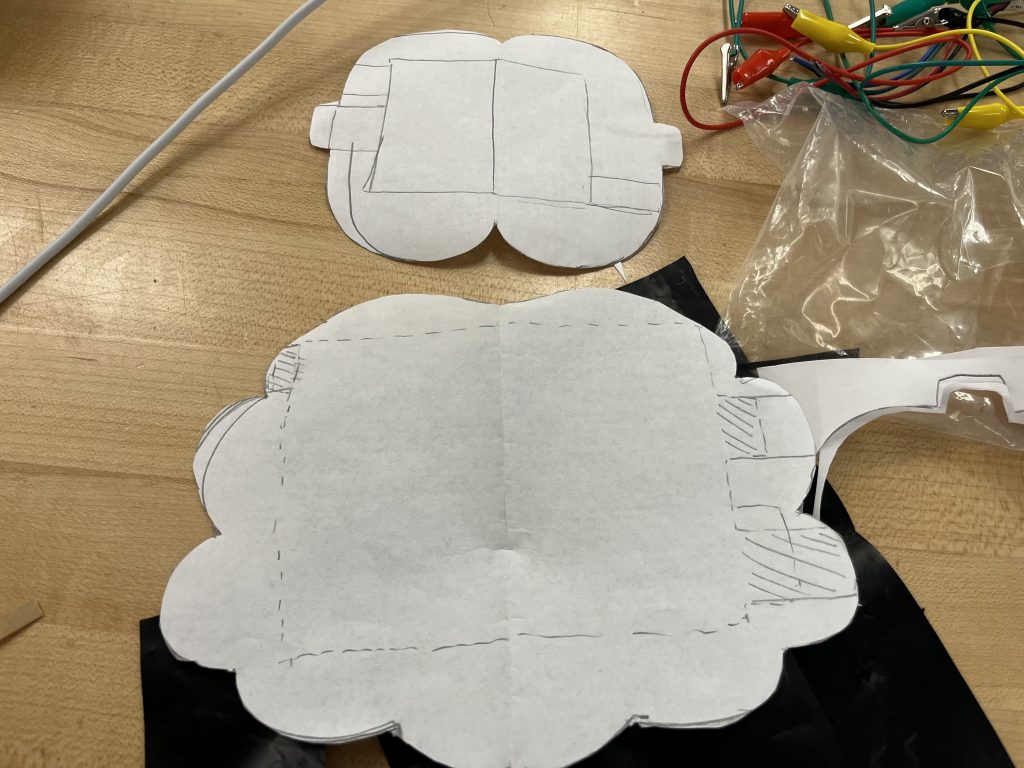
The confusion just came out after connecting it to the real Velostat. For one piece it did perfectly, but for another one no matter how hard I pressed it still did not function. I was not annoyed and we searched for the possible reason step by step, and then I knew it was 2 cables mismatching. I debugged it and soon all of them could work, including the simpler pumpkin circuit and the series circuits for the cloud.
By the way, the codes for one piece is below ( it’s both suitable for the cloud and the pumpkin):
#include <Adafruit_CircuitPlayground.h>


#define NOTE_C4 262
#define NOTE_D4 294
#define NOTE_E4 330
#define NOTE_F4 349
#define NOTE_G4 392
#define NOTE_A4 440
#define NOTE_B4 494
#define NOTE_C5 523
#define NOTE_GS4 415
#define NOTE_AS4 466

char song[] = "ca BafCg  aB BfggA gf ";
int beats[] = { 1, 1, 1, 1, 1, 1, 2, 1, 1, 1, 1, 1, 1, 1, 2, 1, 1, 1, 1, 1, 1, 2, 4 };

int tempo = 50;

char names[] = { 'c', 'd', 'e', 'f', 'g', 'a', 'b', 'C', 'A', 'B' };
int tones[] = { NOTE_C4, NOTE_D4, NOTE_E4, NOTE_F4, NOTE_G4, NOTE_A4, NOTE_B4, NOTE_C5, NOTE_GS4, NOTE_AS4 };

unsigned long startTime = 0;
int noteIndex = 0;

void setColors(int arrangementIndex) {
  int colors[][3] = {
    {0,102,204},     // A
    {51, 255, 255},    // B
    {153, 153, 255},   // C
    {178, 102, 255},     // D
    {51, 51, 255}      // E
  };


  // Set LED colors based on the arrangementIndex
  for (int i = 0; i < 5; i++) {
    int ledIndex1 = i + (arrangementIndex * 2);
    int ledIndex2 = i + (arrangementIndex * 2) + 5;
    CircuitPlayground.setPixelColor(ledIndex1, colors[i][0], colors[i][1], colors[i][2]);
    CircuitPlayground.setPixelColor(ledIndex2, colors[i][0], colors[i][1], colors[i][2]);
  }
}

void playSong()
{
  delay(100);

  if (noteIndex >= sizeof(song) - 1)
  {
    // All notes have been played, reset for the next play
    noteIndex = 0;
    startTime = millis();
  }

  unsigned long currentTime = millis();
  unsigned long elapsedTime = currentTime - startTime;

  // Determine the arrangementIndex based on noteIndex
  int arrangementIndex = noteIndex / 3; // Each arrangement for 3 notes

  setColors(arrangementIndex);

  if (song[noteIndex] == ' ')
  {
    // It's a rest
    if (elapsedTime >= beats[noteIndex] * tempo / 5)
    {
      noteIndex++;
      startTime = currentTime;
    }
  }
  else
  {
    // It's a note, play it
    playNoteByName(song[noteIndex], beats[noteIndex] * tempo);

    if (elapsedTime >= beats[noteIndex] * tempo)
    {
      noteIndex++;
      startTime = currentTime;
    }
  }
}

void playNoteByName(char noteName, int duration)
{
  for (int i = 0; i < sizeof(names); i++)
  {
    if (names[i] == noteName)
    {
      playNote(tones[i], duration);
      break;
    }
  }
}

void playNote(int frequency, int duration)
{
  if (!CircuitPlayground.slideSwitch())
  {
    return;
  }
  else
  {
    CircuitPlayground.playTone(frequency, duration, false);
    delay(duration + duration / 16);
  }
}

int lightValue;

int sensorAnalogPin = 10;
int LED_PIN = 3;
int sensorReading;
int THRESHOLD = 930;

void setup(void) {
  Serial.begin(9600);
  CircuitPlayground.begin();
  pinMode(LED_PIN, OUTPUT);
}

void loop() {
  sensorReading = analogRead(sensorAnalogPin);
  Serial.print("Sensed: ");
  Serial.println(sensorReading);

  if (sensorReading > THRESHOLD) {
    playSong();
    digitalWrite(LED_PIN, HIGH);
  } else {
    CircuitPlayground.clearPixels();
    digitalWrite(LED_PIN, LOW);
  }

  delay(2);
}
I also got involved in the part making pumpkins and clouds. Clouds were relatively simple, but the pumpkin could not stand up as it should be. Finally, Sophia solved this problem by sewing the two pieces together, and we are glad to show it to other i-designers and Fimbel instructors!
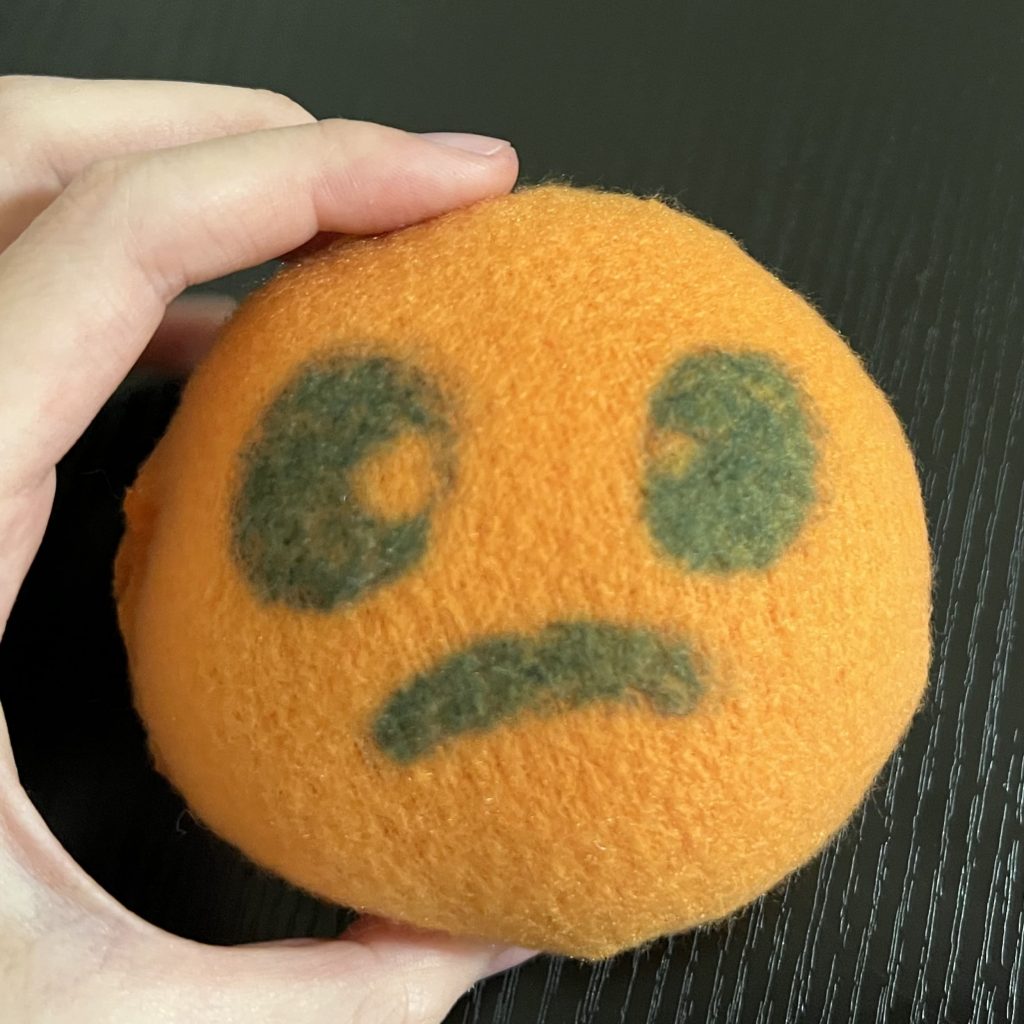
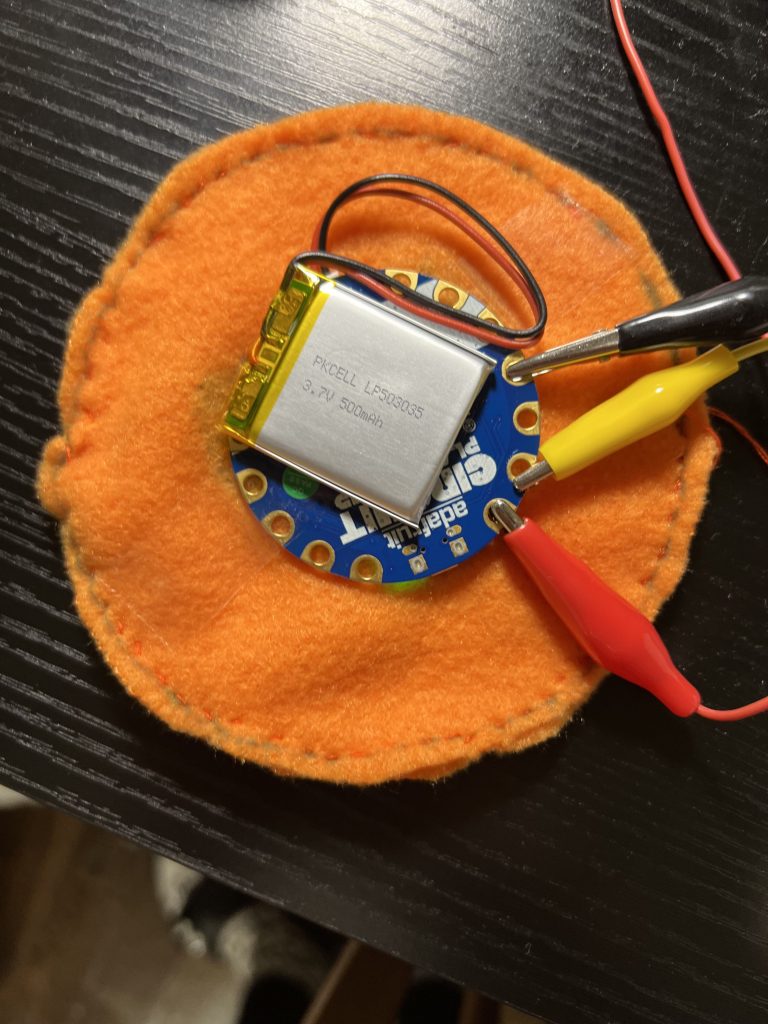
Now let me introduce you the final product!!
Reflection
Reflecting back on the project my group and I undertook to create interactive Halloween pumpkins and storm clouds, it is clear that I embraced the concept of cognitive flexibility. My journey through the project included learning new skills, troubleshooting, and adapting to a changing environment. My willingness to explore Velostat, try out different voices, and tackle the challenges of connecting CPDs demonstrates my openness to different perspectives and problem-solving approaches. In terms of the impact of cognitive flexibility on problem solving, my experience highlights the importance of considering multiple perspectives and being open to alternative solutions. The process of debugging and tweaking my circuit design and finding creative solutions to make the pumpkin stand up illustrates how flexibility in thinking can lead to more effective results.
Cognitive flexibility has been an invaluable asset in my wider learning journey. It has enabled me to explore a variety of courses and specialisms even beyond my initial intentions, developing a well-rounded skill set and the ability to adapt to different challenges. This teamwork project experience has made me more aware that sometimes sticking to a rigid plan can hinder progress, and that the ability to pivot and adapt can lead to better outcomes.
Looking back, when I initially found myself struggling with pumpkins and having trouble getting the cotton to be wrapped, I solved the problem by seeking out Sophia and Edlyn’s solutions from different perspectives. In this case, we explored the possibilities of stapling and sewing, and in the end sewing won out. It does show that sometimes it is perhaps not as beneficial to stick to one of your plans as it is to move on to a new one. Adaptability is a strength and sometimes a change of direction is the wisest choice. What I would say to my former self is to stay open to new possibilities and not be afraid to embrace change when it leads to better results.
