Tag: 3d printing
Mojo 3D printer
Before you start:
- Save your 3d file in .stl format and copy it to cadet.
- Make sure the printer platen has a clean modeling base on it (the removable black plastic tray)
- Printer should be powered on with LED showing steady green.
- Software setup steps are in the video below.
When your print is completed:
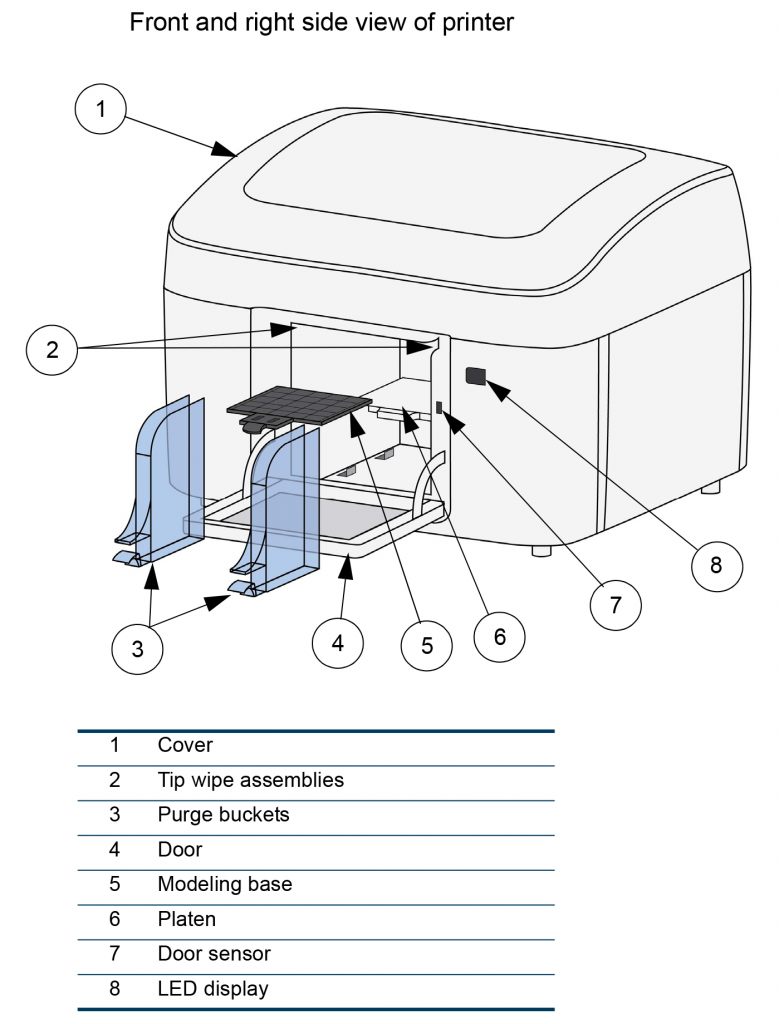
- Wiggle the modeling base slightly while pulling toward you to remove it from the printer
- Gently crack the printed part(s) off the modeling base. Smaller parts should pop right off with a little “persuasion” from a chisel or scraper. For larger parts, it helps to bend the modeling base a bit, to crack the support material away from the base.
- Put your part(s) in the WaveWash and turn it on. Use the 3d printed sieve basket for very small parts.
- The WaveWash runs for 8 hours. This is usually enough to remove the support material. You can run it more than once if you need to.
- When all support material is dissolved, fish your part(s) out with the metal strainer. Wash printed part(s) thoroughly with warm water and a little dish detergent.
- Wash your hands and anything that came in contact with the WaveWash solution. The WaveWash solution is safe to go down the sink drain, but avoid eye contact or prolonged skin contact with it, and obviously don’t drink any.
- When done, wipe down work area with paper towels.
Clean up and reset the Mojo for the next job:
- Place the used modeling base on the mount near the Mojo.
- Using a wide chisel, carefully scrape away any remaining model or support material. Talk to Fimbel staff if you haven’t already had sharp tool training.
- Grab a shop vac and vacuum up the plastic fragments which by now have gotten everywhere. Also vacuum any stray material from the inside of the Mojo.
- Pull the two purge buckets from the Mojo (pinch down on the little tabs at the bottom) and dump their contents into the trash.
- Find the two tip wipe assemblies (thumbnail-size wire brushes where the printer “wipes its nose” during operation). You can lift them right off their pegs and inspect them. Clean them of any residual material.
- Put all parts back in place, and verify that you get a steady green LED when you close the door of the Mojo.
- Quit the Mojo Control Panel and/or Print Wizard software.
Introduction to Meshmixer
3D Printer General Knowledge Test
What is a 3D Printer?
3D Printing Stamp Requirements
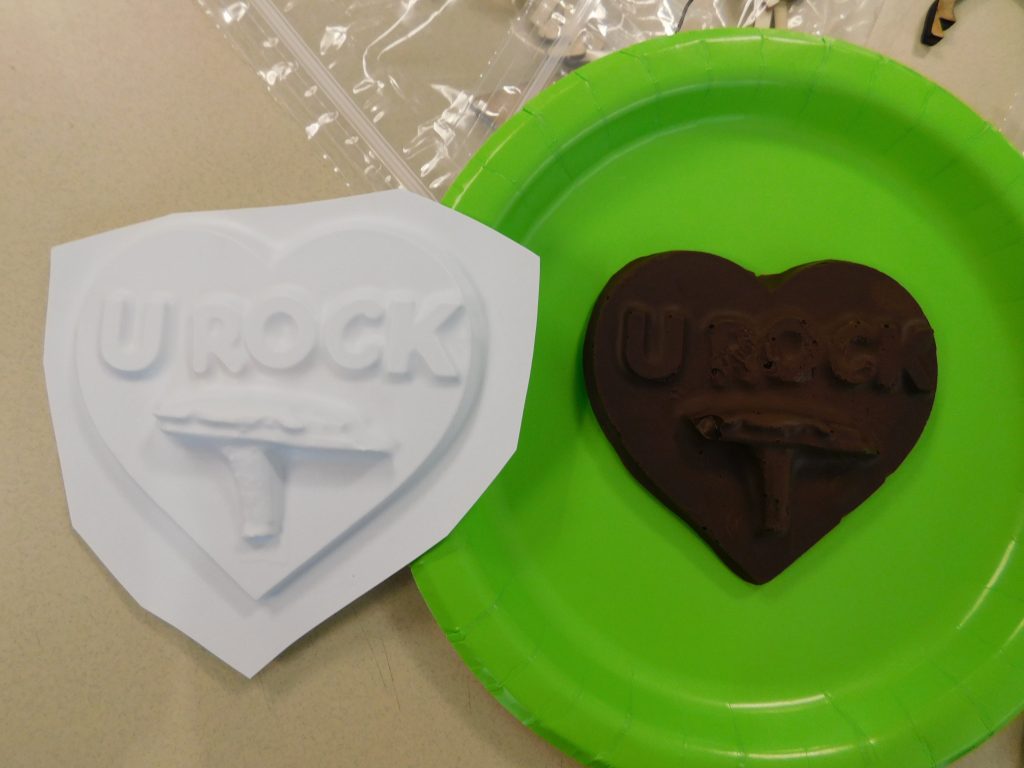
Chocolate Lab
Session 1: Learn the basics of 3D design using OnShape CAD software by modeling a classic chocolate bar, then print out your models with our 3D printers. Models created during this session can be used to create custom molds for Session 2.
Session 2: Learn the physics and food chemistry behind tempering chocolate, then customize your chocolate with personalized shapes & molds. You can arrange your own design using 3D printed and laser cut shapes and letters right on the spot, or use your 3D model from Session 1.
1 to 2 hours each session