Photoshop is a big, complex piece of software. You’re not going to learn everything about it in a day or even a year, but that’s OK — you have to start somewhere!
In the Camera Raw environment, you can make all kinds of adjustments to color, contrast, etc. There are many ways to do this; it’s more art than science. Here’s a basic workflow for processing raw camera files:
Before you start
- Set up your work environment to reduce glare on your monitor.
- Turn up the monitor brightness so that the display is easy to see (if working on a laptop, plug in your charging cable).
- Wipe your monitor clean of dust and junk.
Import your images into the Camera Raw editor
- Copy your images from the camera’s SD card to your computer. They will appear as Raw files with an extension like .CR2, .NEF, etc.
- Select the camera image files you wish to work on
- Right-click on them and open with Photoshop
- The Camera Raw environment appears
Adjust white balance
- Expand the Basic controls and find the White Balance settings.
- Select Custom white balance, then click on the eyedropper icon
- With the eyedropper tool, select an area of your image that should be pure white. This could be the white patch of the color chart. Neutral gray works too.
Adjust exposure and contrast
- Look at the histogram at the upper right corner.
- If histogram has a flat spot on the right side (highlight), your image is underexposed: move the Exposure slider to the right to increase exposure
- If histogram is flat on the left side (shadow), image is overexposed: slide left to reduce exposure
- Changes to exposure can also affect contrast (the range between darkest & lightest pixels).
- Move the Contrast slider until image looks balanced.
- For finer contrast control, you can move the Highlights, Shadows, Whites and Blacks sliders as well.
- Be aware of how your changes affect both the image and the histogram.
- Look carefully at the entire image and use your aesthetic judgement.
- Keep it subtle — most of these controls will make the image look weird / fake if pushed too far in either direction.
Reduce noise
Raw files tend to have a grainy quality that you can smooth out for a more pleasing image. You’ll usually notice it more in images that needed bigger Exposure adjustments.
- Collapse the Basic controls and expand the Detail section.
- Click on the zoom control at lower left and set the magnification to at least 100%.
- While holding down the spacebar (the cursor becomes a hand), click and drag your mouse to navigate to a detailed area of the image.
- Experiment with the Noise Reduction and Color Noise Reduction controls. Try something like :
- Noise Reduction = 50; Detail = 20; Contrast = 20
- Color Noise Reduction = 50; Detail = 20; Smoothness = 20
- Changes that you made to Exposure and Contrast in previous steps may increase noise. Watch out for multicolored noise in shadow areas.
- You may not need to add Sharpening, but try the controls and see what happens.
- Remember that every image is different and there is no “one size fits all” solution for these settings. Trust your eyeballs!
Remove lens distortion
- Open the Optics controls
- Enable Lens Profile Correction (this fixes geometric lens distortion)
- Enable Remove Chromatic Aberrations (fixes color artifacts introduced by the lens)
- Through the magic of XMP metadata, Photoshop knows what kind of camera and lens the image was made with, and applies appropriate corrections. This is especially helpful when shooting flat artwork.
Next steps
- Click on Open to continue working on the image in Photoshop.
- Or just save it to native Photoshop format (.psd) to “bake in” your adjustments. The Raw file remains untouched.
- The changes you made in the Camera Raw environment are saved in a separate “sidecar” file with the .xmp extension.
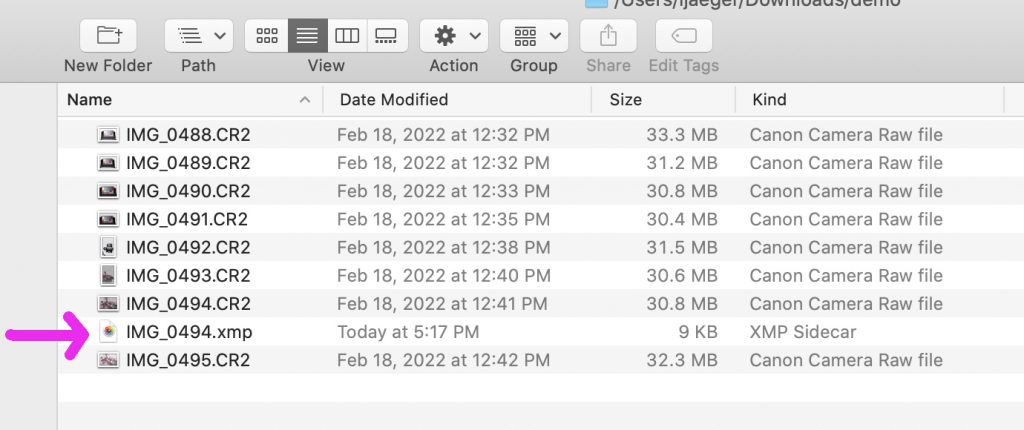
- The next time you open the Raw file, it will come up with your saved settings applied, as long as the .xmp file is still present in the same folder. This allows you to non-destructively edit your settings later!
- To revert the raw file to its original state, simply trash the .xmp file.
- The .xmp file is just a bunch of xml. You can open it with a text editor and see what sort of info is getting saved, if you’re interested.